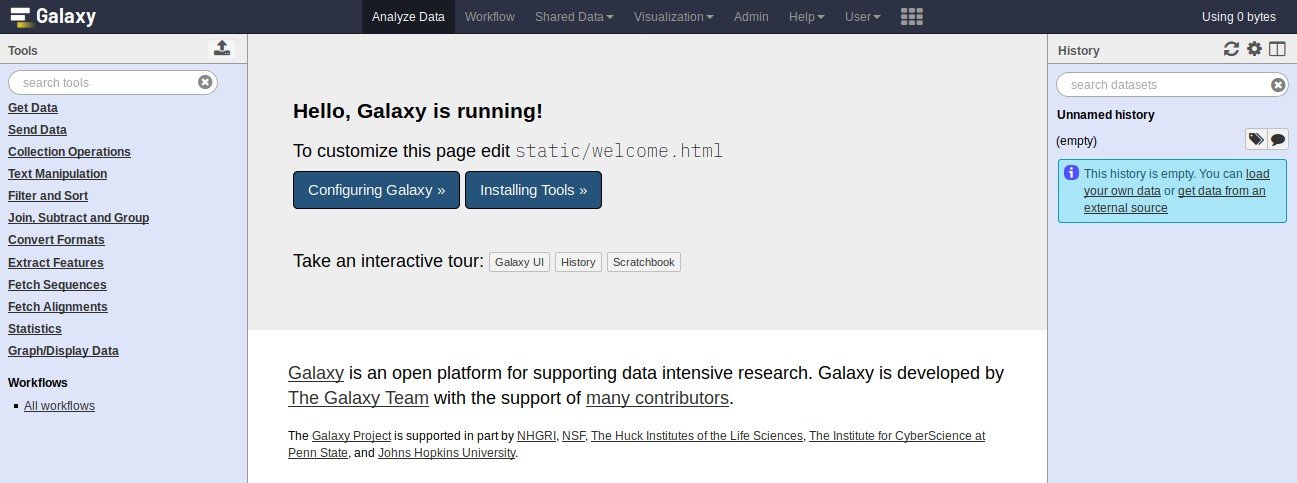
This is a step-by-step tutorial on running an instance of the Galaxy platform (v17.09) for biomedical research on Ubuntu 16.04 LTS.
Updates
- Aug 18, 2021
-
The title of this blog post is changed from “Setup your own instance of the Galaxy Bioinformatics platform on DigitalOcean” to “Running Galaxy project on Ubuntu”, as these steps can be performed on a standalone Ubuntu system and on VPS providers other than DigitalOcean.
The URL of this blog post is changed from https://vimal.io/setup-your-own-galaxy-bioinformatics-instance-on-digitalocean/ to https://vimakvn.com/running-galaxy-project-on-ubuntu.
Minor updates to text, links, and formatting.
I will use DigitalOcean as the VPS provider in this tutorial, but you can perform these steps on any Ubuntu system.
When complete, you will have an instance of Galaxy which can be used to host tools developed by the research group.
Let’s begin by creating the virtual server.
Step 1: Create the virtual server (droplet)
First, you will need an account on DigitalOcean, which is a paid service.
If you would like to support my work, you can use this referral link to sign up on DigitalOcean. You will get a $100, 60-day credit.
Once you have confirmed your email account and completed the verification step by adding a payment method, your can start creating virtual servers — also known as droplets.
The server we are going to create will be based on Ubuntu 16.04 LTS and will cost about $5 per month for the basic configuration — 512MB Memory, 1 CPU and a 20GB Hard disk.
To create a new droplet:
- Click on the Create Droplet button.
- In the next page, click on the $5/mo server panel in the Choose a size section.
- Leave all other options at their defaults and then click on the Create button at the bottom of the page.
Once the droplet is created, you will receive an email with details
for accessing the droplet using SSH — IP Address, Username and Password. You
can connect to the droplet using the ssh command like this 1
ssh root@server-ip
You will be prompted to change the root password when you first login.
IMPORTANT
Please make sure to destroy the droplet if you are only using it for the purpose of this tutorial. Droplets that are powered down will still be charged after the credit is used up!
We can now proceed towards configuring the droplet.
Step 2: Configure droplet
2.1 Create user with administrative access
For all administrative functions like installing software, creating user accounts,
database and configuring the web server, we will create a separate account
with administrator privileges. This can be done by adding the user to the sudo
group. In the following example, I am creating a new admin user called vimal and setting a password:
useradd -m -s /bin/bash -G sudo vimal
passwd vimal
Login as the admin user using SSH to continue with the rest of the tutorial:
ssh vimal@server-ip
2.2 Add swap space
The database migration scripts that run when Galaxy is first launched require more memory than we have available (512MB). We can make use of a swap file so this process completes.
To create and activate a 2GB swap file in the Root (/) partition, the following commands can be used:
sudo fallocate -l 2G /swapfile
sudo chmod 600 /swapfile
sudo mkswap /swapfile
sudo swapon /swapfile
Enable swap on boot by adding the following line to /etc/fstab:
/swapfile none swap sw 0 0
NOTE
This is only a temporary measure.
Frequent use of swap will degrade performance of both the application and the hardware. Also, programs requiring more memory (example: alignment) will fail to work. It is better to upgrade to a plan with more memory (RAM) for better performance.
We can now proceed towards installing required software.
2.3 Install required software
First, refresh the package repositories, then upgrade system packages and then remove packages that are no longer required. All these steps can be done using the following command:
sudo apt update && sudo apt -y upgrade && \
  sudo apt -y autoremove
Install build tools, Git, Apache web server and required modules, Virtualenv for creating virtual Python environments, libraries and functions required for building Python packages, the PostgreSQL_ database server, client and libraries:
sudo apt -y install build-essential git apache2 \
libapache2-mod-xsendfile virtualenv python-dev \
postgresql postgresql-contrib postgresql-client \
libpq-dev
2.4 Set PostgreSQL administrator password
Set a password for the PostgreSQL administrator account — postgres using psql:
sudo -u postgres psql template1
postgres=# \password postgres
postgres=# \q
2.5 Enable required Apache modules
Enable modules necessary for running Galaxy under Apache. Restart apache2 service for configuration to take effect:
sudo a2enmod rewrite xsendfile expires proxy proxy_http deflate headers
sudo systemctl restart apache2
2.6 Create Galaxy user accounts and database
Create a Linux user account called galaxy and set a password for this user:
sudo useradd -m -s /bin/bash galaxy
sudo passwd galaxy
As PostgreSQL administrator, create a database user called galaxy and a database owned by that user, also called galaxy:
sudo -u postgres createuser -P galaxy
sudo -u postgres createdb -O galaxy galaxy
Step 2: Configure the Apache web server
We will serve the Galaxy web interface from a sub directory like
http://server-ip/galaxy
To do this, create a new VirtualHost configuration by creating a file
/etc/apache2/sites-available/galaxy.conf
as the admin user and add the following content:
<VirtualHost *:80>
    # ServerName is currently set to the IP address. When a domain name is
    # available, this directive should be updated
    ServerName server-ip
    ErrorLog ${APACHE_LOG_DIR}/galaxy-error.log
    CustomLog ${APACHE_LOG_DIR}/galaxy-access.log combined

    RewriteEngine On
    RewriteRule ^/galaxy$ /galaxy/ [R]
    RewriteRule ^/galaxy/static/style/(.*) /home/galaxy/galaxy/static/june_2007_style/blue/$1 [L]
    RewriteRule ^/galaxy/static/scripts/(.*) /home/galaxy/galaxy/static/scripts/packed/$1 [L]
    RewriteRule ^/galaxy/static/(.*) /home/galaxy/galaxy/static/$1 [L]
    RewriteRule ^/galaxy/favicon.ico /home/galaxy/galaxy/static/favicon.ico [L]
    RewriteRule ^/galaxy/robots.txt /home/galaxy/galaxy/static/robots.txt [L]
    RewriteRule ^/galaxy(.*) http://localhost:8080$1 [P]

    <Location "/galaxy">
        # Compress all uncompressed content.
        SetOutputFilter DEFLATE
        SetEnvIfNoCase Request_URI \.(?:gif|jpe?g|png)$ no-gzip dont-vary
        SetEnvIfNoCase Request_URI \.(?:t?gz|zip|bz2)$ no-gzip dont-vary
        SetEnvIfNoCase Request_URI /history/export_archive no-gzip dont-vary
        XSendFile on
        XSendFilePath /
    </Location>

    <Location "/galaxy/static">
        # Allow browsers to cache everything from /galaxy/static for 6 hours
        Require all granted
        ExpiresActive On
        ExpiresDefault "access plus 6 hours"
    </Location>
</VirtualHost>
Save the file and then enable the site i.e., this VirtualHost configuration and reload Apache:
sudo a2ensite galaxy
sudo systemctl reload apache2
Step 3: Download, configure and start Galaxy
Login as the galaxy user using SSH.
Clone the current stable galaxy release 2 using Git:
git clone -b release_17.09 \
   https://github.com/galaxyproject/galaxy.git
Create a Python 2 virtual environment for galaxy:
cd galaxy
virtualenv -p python2 galaxy_env
Create a configuration for Galaxy by making a copy of the sample configuration:
cp config/galaxy.ini.sample config/galaxy.ini
Make changes in galaxy.ini as given below. There are detailed
comments in this file as to what these options do.
As we are using Apache as the proxy server uncomment the filter-with
option and specify the cookie_path option in the [app:main]
section:
[app:main]
filter-with = proxy-prefix
cookie_path = /galaxy
As we are using PostgreSQL, the database_connection setting in the
Database section should be changed to the following:
database_connection = postgresql:///galaxy?host=/var/run/postgresql
For better performance with large database queries in PostgreSQL, we can also set the following:
database_engine_option_server_side_cursors = True
Also to use Apache to handle file downloads instead of Galaxy’s own HTTP server,
we will need to set the following apache_xsendfile option in the
[app:main] section:
apache_xsendfile = True
As this is a production server, disable live debugging:
use_interactive = False
Finally, in the Users and Security section, add your email address to
the admin_users variable:
admin_users = you@email.com
If public access to this instance is not desired, disable anonymous access and disable user registration:
require_login = True
allow_user_creation = False
Save galaxy.ini, activate virtualenv and then
start Galaxy in daemon mode:
# Activate the virtualenv
source galaxy_env/bin/activate

# Start Galaxy in daemon mode
./run.sh --daemon
A log file, paster.log will be generated in the same directory.
Once the message Entering daemon mode is displayed, use the
command:
tail -f paster.log
to view the log. When the script has finished initialisation, the following message will appear:
serving on http://127.0.0.1:8080
At this stage, visit http://server.ip/galaxy, register an account with the
same email address specified under admin_users and login.

Step 4: Improving security and performance, updating Galaxy
4.1 Secure SSH access
In the default setup, SSH runs on port 22 and allows all users to login
with a password including root. These are some additional steps for securing
SSH access. All these configuration changes should be made
in the file /etc/ssh/sshd_config.
Change default port
The port that SSH listens on is specified in the Port option:
Port 22
To prevent unauthorised login attempts on the default SSH port (22), the recommendation is to change the port to a number less than 1024. The port that is selected should not currently be used by any other service. You can check the list of ports currently assiged to services here or lookup IANA port assignments.
Once the port is changed, restart the sshd service, open the specified port in firewall (Refer: Configure firewall section below). Test if SSH access is working and then close port 22 in firewall.
Disable root login
If you do need to login as root, you can do so using su - once logged in
with a regular user account:
PermitRootLogin no
Disable password authentication
As an increased security measure, setup SSH key based authentication. Here is a tutorial explaining the procedure. Once all users have SSH keys setup and working (important!), disable login with password completely:
PasswordAuthentication no
Restrict users with SSH access
Only the users specified here will be allowed to connect. Accepts a space separated list of user names::
AllowUsers galaxy vimal
4.2 Configure firewall
A firewall can be enabled and rules can be configured to allow access only to specific ports and services.
NOTE
This following commands assume that SSH is running on port 822 instead of the default (22). If your configuration is different, please change the port accordingly.
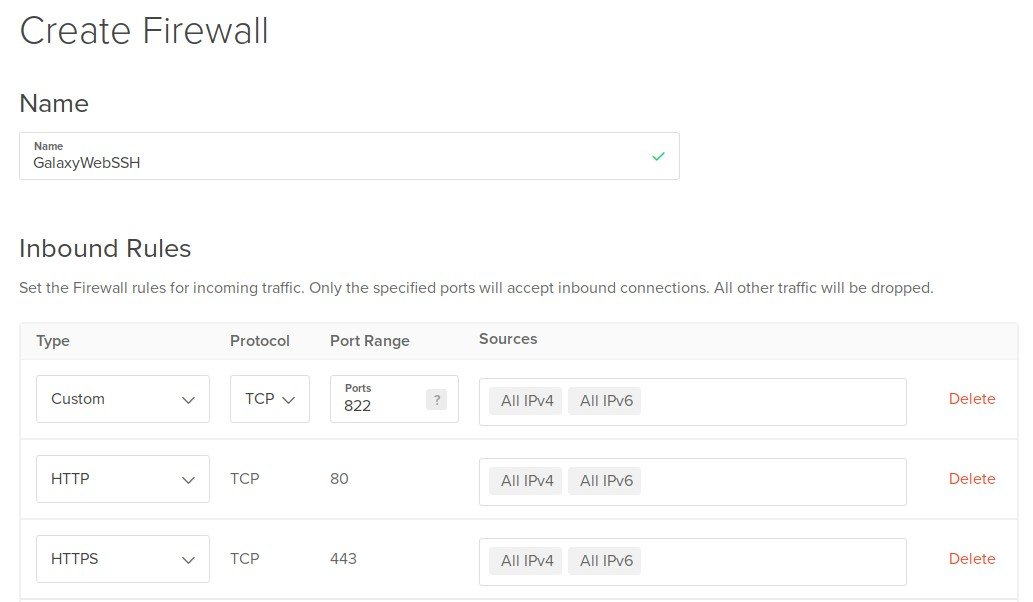
One possibility would be to use the Cloud Firewall function available on DigitalOcean and create a configuration which can be applied to the droplet. A tutorial is available here.
An example configuration allowing access to SSH(822), HTTP(80) and HTTPS(443) is below:

An alternative firewall configuration using UFW:
ufw allow 822
ufw allow http
ufw allow https
Check status
ufw status
Output:
Status: active

To                         Action      From
--                         ------      ----
822                        ALLOW       Anywhere
80                         ALLOW       Anywhere
443                        ALLOW       Anywhere
822 (v6)                   ALLOW       Anywhere (v6)
80 (v6)                    ALLOW       Anywhere (v6)
443 (v6)                   ALLOW       Anywhere (v6)
4.3 Enable HTTPS
For encrypted web communications, it is essential to use an SSL certificate and re-configure Apache. Free SSL certificates can be obtained from Letsencrypt or Cloudflare.
The following procedure uses a self-signed certificate (for demonstration only, not recommended).
Enable Apache SSL HTTPS site configuration and the SSL module:
a2ensite default-ssl.conf
a2enmod ssl
Now modify the port in galaxy virtualhost configuration from 80 to 443 and
reload apache. It should now be possible to access the web interface at
https://server.ip/galaxy.
4.4 Keep your Galaxy instance up to date
The Galaxy mailing list provides information on new releases and any security vulnerabilities that have been discovered.
You can use the following command to get any updates that have since been issued
after the release (17.09 in this example):
git checkout release_17.09 && git pull --ff-only \
  origin release_17.09
References
- Get Galaxy
- Running Galaxy in a production environment
- Proxying Galaxy with Apache
- UFW, Ubuntu Community Wiki
- An Introduction To DigitalOcean Cloud Firewalls
- PostgreSQL, Ubuntu Server Guide
- Apache 2 Web Server, Ubuntu Server Guide
- How To Set Up SSH Keys, DigitalOcean
Footnotes
Cover photo by Rafael Cerqueira on Unsplash.


Comments