This post is about the free and open source software I used for creating an online course.
I published my first online course on Udemy recently. It is about creating a website and blog (like this one) using programs written in Python. This post is about the software I used for creating course content - screencasts with audio, lecture notes and an eBook. This was done on an Ubuntu Linux machine with free and open source software.
Recording Screencasts with Kazam
For recording screencasts (recording actions on the desktop), I used Kazam. It is available in the Ubuntu software center. I saved the output as H264 (MP4).
These shorcuts were useful
CTRL + Super (Win) + R - Start recording
CTRL + SUPER (Win) + F - Finish recording
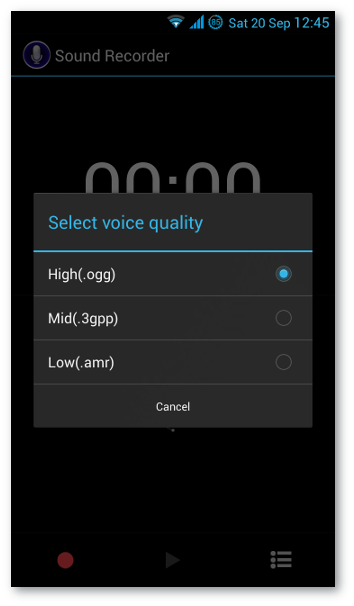
Recording Audio with Sound Recorder
For recording audio, I used the sound recorder app on my Phone. Here are the settings I used

Editing Audio with Audacity
I imported the *.ogg files produced from the recording into
Audacity. Audacity is available in
the Ubuntu software center. For Windows, you can download the
installation package from
Audacity’s website.
For processing the audio, I followed instructions from
this youtube video. At times, noise
removal alone was sufficient to get nice sounding audio. I also removed
(CTRL + X) or silenced parts of the audio that I didn’t need.
Edit → Remove Audio or Labels → Silence Audio
Editing Videos with Blender
Combining screencasts with audio was done using Blender Again, Blender is available in the Ubuntu software center. A version for Windows can be downloaded from the Blender website.
Blender could be overwhelming at first. Here is a tutorial on using the video editing feature.
Here is a sample Blender project
(4MB, zip), from my course (includes a .blend file, video and audio
files). The final video produced from this project is available
here (3MB,
avi).
Some tips
- Right click to select a clip (video or audio).
- Right click and drag to move a clip.
- Use mouse wheel to Zoom in/out.
- Use
CTRL+ mouse wheel to move the view port. Xto remove a clip (when selected with a right click).Kto soft trim a clip. The clip can then be resized later.SHIFT+Kto trim a clip.
eBook and Lecture Notes
Along with the video tutorials, I also included notes and an eBook. Here is a sample chapter (pdf). I used Sphinx and the rst2pdf extension for generating the PDF output.
Slide presentation
For the slide presentation in the promo/intro video, I used reveal.js.
Graphics
For designing the cover for the course and eBook, I used Inkscape and Gimp. For capturing screenshots, I used Shutter.
Comments