
I’m doing this on Linux Mint 20.2, but these steps would also work on Ubuntu 20.04 LTS or derivatives.
Contents
[TOC]
Note:
If you have an existing Sphinx project, skip step 2 and proceed to step 3. Build PDF output.
Step 1: Install required packages
Using Software Manager or apt, install the following packages.
python3-venv
latexmk
texlive-latex-recommended
texlive-latex-extra
texlive-xetex
fonts-freefont-otf
texlive-fonts-recommended
texlive-lang-greek
tex-gyre
Note:
texlive-xetexis only needed, if you are planning to use custom fonts that are not available in LaTeX.
python3-venvcontains the python module used to create a new virtual python environment.
If you are using apt, first update the package cache:
sudo apt update
Then install packages:
sudo apt install fonts-freefont-otf latexmk python3-venv \
texlive-fonts-recommended texlive-latex-recommended \
texlive-latex-extra texlive-lang-greek \
tex-gyre texlive-xetex
Step 2: Create Sphinx project
Note:
If you have an existing Sphinx project, skip this step and proceed to step 3.
Summary of steps involved in creating a new Sphinx project:
A. Make new directory
B. Set up a Python virtual environment
C. Install Sphinx
D. Create project
A. Make new directory
Sphinx will create a number of files when creating a new project so it is better to create a new directory and change into it:
mkdir sphinx-pdf-demo
cd sphinx-pdf-demo
B. Set up a Python virtual environment
To create a virtual environment, type the command:
python3 -m venv venv
Here -m is used to specify the module we would like
to use — venv in this case. The last venv is the
directory where the virtual environment will be
created.
Activate the virtual environment:
source venv/bin/activate
A (venv) label should appear at the beginnning of the command
prompt, indicating that the virtual environment is now
active.
Why create a virtual environment?
Although you can install Sphinx from Linux package repositories, there are some advantages in creating and using a virtual environment. For example, you can install the latest version of Sphinx from PyPI, install additional Python packages or Sphinx extensions, or themes that are not available in Linux package repositories.
C. Install Sphinx
First, install (or update) Python build tools. This will ensure further packages will build and install without problems.
pip install -U pip setuptools wheel
Then install Sphinx:
pip install Sphinx
D. Create project
To create a new Sphinx project, run the sphinx-quickstart script that is included with Sphinx.
While still in the sphinx-pdf-demo directory and with the virtual environment still active, type:
sphinx-quickstart
Answer the prompts.
Here is a sample terminal session:
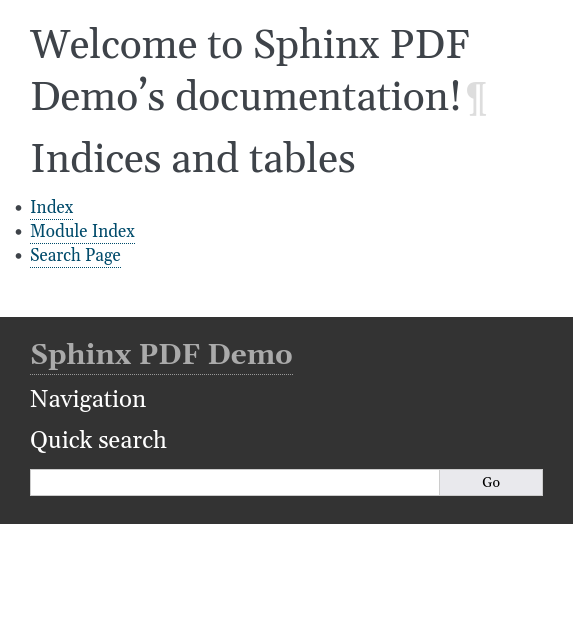
The Sphinx project is now created. To preview it, the quickest way is to build the HTML version. To do that, type:
make html
Using file manager, navigate to the build/html directory
of the project and open index.html in
a browser.
This will display the main page.
Step 3: Build PDF output
To build the PDF version, type:
make latexpdf
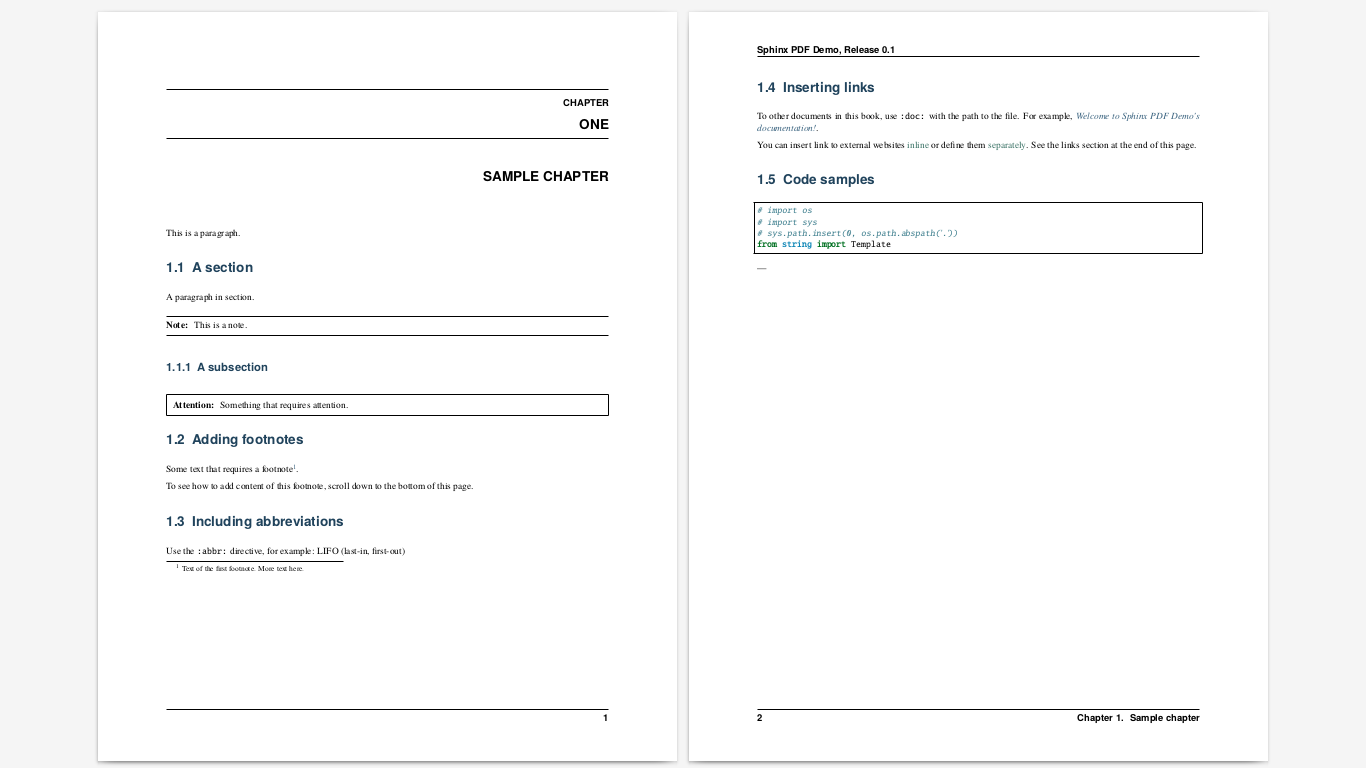
Once the build process is complete, open sphinxpdfdemo.pdf in the build/latex directory.
This file will not have any content. Let’s add some.
Right-click on this link
and save the file as sample-chapter.rst in the
source directory.
Add sample chapter to table of contents in index.rst:
.. toctree::
   :maxdepth: 2
   :caption: Contents

   sample-chapter
Save the file.
Now, rebuild PDF:
make latexpdf
The resulting PDF file will include the sample chapter.
Comments